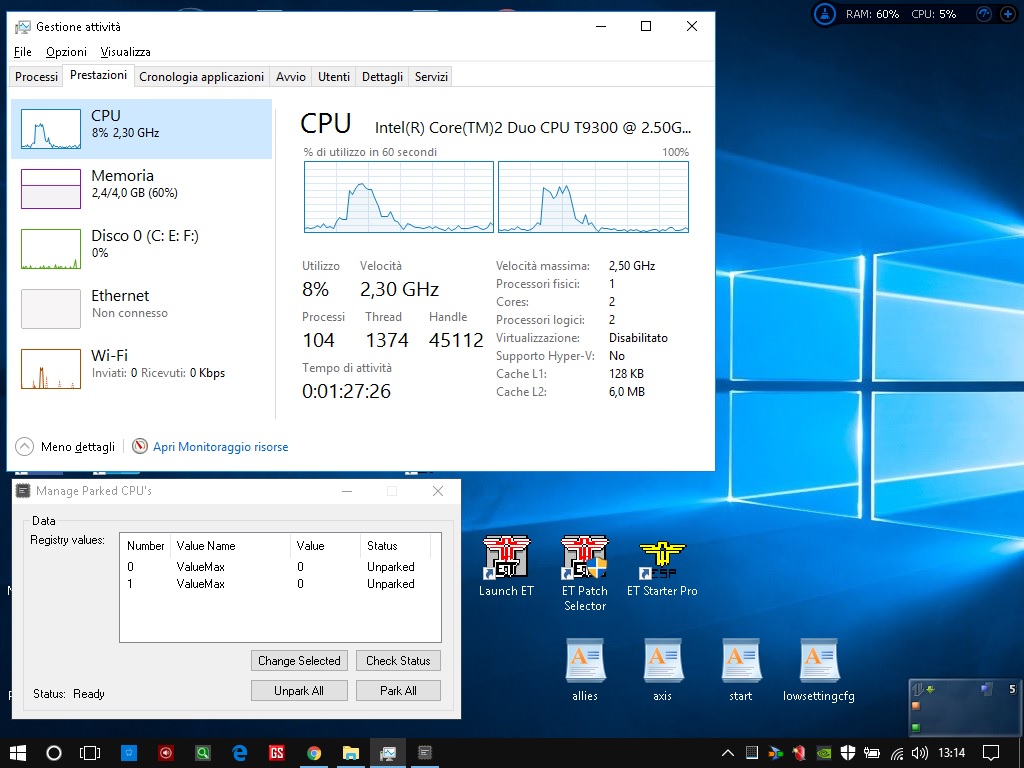
Unparking CPU cores can improve performance during demanding tasks by re-enabling disabled cores.
This guide outlines how to safely and efficiently unpark CPU cores using tools like ParkControl.
Introduction:
If you’re a computer enthusiast or a power user, you’ve likely heard about CPU core parking. This power-saving feature is used by Windows to disable certain CPU cores when they’re not needed.
While this can help save energy, it might also limit your computer’s performance during demanding tasks like gaming, video editing, or running virtual machines. Unparking CPU cores can lead to a more responsive system and improved performance. In this guide, we’ll walk you through the process of unparking CPU cores safely and efficiently.
What is CPU Core Parking?

CPU core parking is a feature in modern Windows operating systems designed to improve power efficiency. When your computer is not under heavy load, the operating system will park (disable) some CPU cores to reduce power consumption and heat generation. While this is beneficial for energy saving, it can negatively impact performance during high-demand tasks.
Why Unpark CPU Cores?
Unparking CPU cores can be beneficial for several reasons:
- Improved Performance: For tasks that require high CPU usage, such as gaming, video editing, or heavy multitasking, having all CPU cores active can lead to smoother performance.
- Reduced Latency: Unparking cores can help reduce latency in applications that require quick response times.
- Better Utilization: If you have a high-end CPU with many cores, unparking them ensures you’re making the most out of your hardware.
Steps to Unpark CPU Cores:
Step 1: Check Core Parking Status
Before unparking your CPU cores, it’s essential to check their current status. You can do this using the Resource Monitor in Windows.
- Press Ctrl + Shift + Esc to open the Task Manager.
- Go to the “Performance” tab and click on “Open Resource Monitor” at the bottom.
- In Resource Monitor, go to the “CPU” tab and check the “CPU Usage” section. Look for parked cores (indicated by the word “Parked” next to the core number).
Step 2: Download a Core Parking Manager
There are several third-party tools available to manage CPU core parking. One popular and reliable tool is the “ParkControl” utility by Bitsum.
- Download ParkControl from the official Bitsum website.
- Install the software by following the on-screen instructions.
Step 3: Unpark CPU Cores Using ParkControl
Once ParkControl is installed, you can use it to unpark your CPU cores.
- Open ParkControl.
- You’ll see a list of power profiles on the left side. Select your active power profile (usually “Balanced” or “High Performance”).
- Adjust the “Core Parking Index” slider to 100% to unpark all cores.
- Click “Apply” to save the changes.
Also Read: How Tight To Tighten Cpu Cooler – A Comprehensive Guide!
Step 4: Verify Unparked Cores
After making changes, it’s essential to verify that your CPU cores are unparked.
- Reopen the Resource Monitor (as described in Step 1).
- Check the “CPU Usage” section again. The “Parked” status should be gone from the cores.
Step 5: Monitor Performance
After unparking your CPU cores, monitor your system’s performance to ensure that it’s benefiting from the changes.
You can use various benchmarking tools like Cinebench, Geekbench, or even in-game performance metrics to see if there’s an improvement.
Potential Risks and Considerations:
While unparking CPU cores can enhance performance, it’s not without potential downsides:
- Increased Power Consumption: Unparking cores can lead to higher power usage and shorter battery life on laptops.
- Higher Temperatures: More active cores can generate additional heat, which might require better cooling solutions.
- System Stability: In some cases, changing power settings can affect system stability. Always monitor your system after making changes and revert if you notice any issues.
FAQ’s
1. What is CPU core parking?
CPU core parking is a power-saving feature in Windows that disables certain CPU cores when they are not needed to reduce power consumption and heat generation.
2. Why should I unpark CPU cores?
Unparking CPU cores can enhance performance for tasks requiring high CPU usage, reduce latency, and ensure better utilization of your hardware.
3. How do I check if my CPU cores are parked?
You can check the status of your CPU cores using the Resource Monitor in Windows, where parked cores are indicated by the word “Parked.”
4. What tool can I use to unpark CPU cores?
A popular and reliable tool for unparking CPU cores is ParkControl by Bitsum.
5. How do I use ParkControl to unpark CPU cores?
After installing ParkControl, select your active power profile, adjust the “Core Parking Index” slider to 100%, and click “Apply” to unpark all cores.
6. How can I verify that my CPU cores are unparked?
Reopen the Resource Monitor and check the “CPU Usage” section; the “Parked” status should be gone from the cores.
7. What are the benefits of unparking CPU cores?
Benefits include improved performance, reduced latency, and better utilization of your CPU’s capabilities.
8.What are the risks of unparking CPU cores?
Potential risks include increased power consumption, higher temperatures, and possible system stability issues.
9. Will unparking CPU cores affect my laptop’s battery life?
Yes, unparking CPU cores can lead to higher power usage and shorter battery life on laptops.
10. How can I monitor the performance after unparking CPU cores?
You can use benchmarking tools like Cinebench, Geekbench, or in-game performance metrics to assess the improvement in performance.
Conclusion
Unparking CPU cores can provide a noticeable boost in performance for demanding tasks. By following the steps outlined in this guide, you can safely and efficiently unpark your CPU cores. Always remember to monitor your system after making changes and ensure that the benefits outweigh any potential drawbacks. With unparking, you can unlock the full potential of your CPU and enjoy a more responsive computing experience.
